长列表优化方案解析
👉 react-infinite-auto-scroller
日常工作中,经常遇到长列表(商品列表,社区帖子列表,动态列表,视频流……)。所以也了解当用户刷到了大量内容时,由于DOM数量激增,页面的性能面临的挑战。
而对长列表的优化库也有很多,但是实际应用到项目中大多又不匹配,要么固定高度,要么需要定制逻辑。所以就自己手动写一遍长列表的优化,了解优化概念以及其中的问题。
构建简易的列表
首先搭建一个简易的列表组件
新建list.tsx
import React, { Component } from 'react';
import Item from '../item';

export default class List extends Component<{}, {
  list: Array<{ text: string; img?: string; }>
}> {
  private refList = React.createRef<HTMLDivElement>();

  private lock = false;

  state = {
    list: [],
  };

  componentDidMount() {
    this.setState({
      list: this.getList(50),
    });
    window.addEventListener('scroll', this.listenScroll, false); // 监听是否滚动到底部,进行触底加载
  }

  componentWillUnmount() {
    window.removeEventListener('scroll', this.listenScroll, false); // 卸载时移除事件监听
  }

  render() {
    return (
      <div className="list" ref={this.refList}>
        <div className="count">{this.state.list.length}</div>
        {this.state.list.map((item: { text: string; img?: string; }, index) => {
          return (
            <Item key={index} text={item.text} img={item.img} /> // 列表项,这里后面需要更换称无限滚动组件
          );
        })}
      </div>
    );
  }

  // 简单实现触底加载
  private listenScroll = () => { // 监听是否到底部
    if (this.lock) return;
    // 防抖
    this.lock = true;
    setTimeout(() => {
      this.lock = false;
    }, 100);
    const targetEle = this.refList?.current;
    if (targetEle) {
      const { bottom } = targetEle.getBoundingClientRect();
      // 如果距离底部还有半屏
      if (bottom < window.innerHeight * 1.5) {
        const list: Array<{ text: string; img?: string; }> = this.state.list;
        this.setState({
          list: list.concat(this.getList(50)),
        });
      }
    }
  };

  private getList(len: number) { // mock数据接口请求
    const list: Array<{ text: string; img?: string; }> = [];
    for (var i = 0; i < len; i++) {
      list.push(this.getItem());
    }
    return list;
  }

  private getItem(): { text: string, img?: string } {
    const t = '高阶组件(HOC)是 React 中用于复用组件逻辑的一种高级技巧。HOC 自身不是 React API 的一部分,它是一种基于 React 的组合特性而形成的设计模式。';
    return {
      text: t.substr(Math.floor(Math.random() * t.length / 2), t.length / 2 + Math.floor(Math.random() * t.length / 2)), // 随机截取一段文本
      img: Math.random() > 0.6 ? `http://iph.href.lu/200x${Math.floor(100 + Math.random() * 300)}` : '', // 随机添加一张图片
    };
  }
}
新建item.tsx,为了尽量还原实际应用场景,我们可以尽量增加一些元素。
import React, { Component } from 'react';

import './index.css';

interface IProps {
  text: string;
  img?: string;
}

class Item extends Component<IProps> {
  render() {
    const { text, img } = this.props;
    return (
      <div className="item">
        <div className="user">
          <img className="avatar" src={require('../../images/3.png').default} />
          <div className="username">123</div>
        </div>
        <p className="text">{text}</p>
        {img ? <img className="img" src={img} alt=""/> : null}
        <div className="controls">
          <div className="action1">
            <img src={require('../../images/1.png').default} />
            0
          </div>
          <div className="action2">
            <img src={require('../../images/2.png').default} />
            0
          </div>
          <div className="action3">
            <img src={require('../../images/4.png').default} />
            0
          </div>
        </div>
      </div>
    );
  }
}


export default Item;
此时的列表看上去长这样⬇️
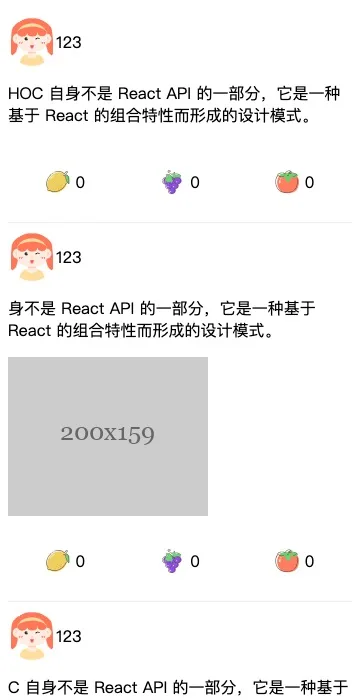
此时,我们列表有多少项,就会有多少个Item组件。
为什么会卡
接着我们来设计长列表优化的逻辑,首先我们需要搞清楚为什么列表长了会卡顿,我总结了一下有以下两个原因:
-
React渲染吃力,当react的虚拟DOM结构复杂时,DOM更新就会明显耗时(因为DIFF算法需要遍历新旧DOM结构)
-
大量DOM操作,即使是React Diff节点速度够快,但是涉及到大量dom节点变更需要与dom进行交互,要知道dom操作都是同步的,且dom操作耗时并会阻塞js往下执行,所以当大量dom交互时,页面会变得明显卡顿。
解决方案
针对长列表卡顿我们知道了原因,就可以针对性的对其进行优化了。
从原因来看,主要问题在于列表长了之后,DOM结构的复杂度增加,导致js调用时间长,dom渲染频繁。
具体实现
第一个想法
既然是因为dom结构复杂,那我们减少dom数量与结构不就好咯。我脑中浮现了第一个想法,并且立即写出了大概的解决方法。
// 声明Map存储DOM节点与REACT组件映射
const map = new Map();

// 使用IntersectionObserver做节点曝光监听
const intersectionObserver = new IntersectionObserver((entrys) => {
    entrys.forEach((entry) => {
        const target = entry.target;
        const handle = map.get(target);
        handle && handle(entry.intersectionRadio > 0);
    });
}, { rootMargin: '50% 50% 50% 50%' });

export default function createInfiniteScrollItem(Component) {
  return class InfiniteScrollItem extends React.Component {
    state = {
      show: true,
      height: 0,
      ready: false,
    };

    private ref = React.createRef<HTMLDivElement>();

    componentDidMount() {
      const current = this.ref.current;
      // 将节点与REACT映射存入map中
      map.set(current, (show: boolean) => {
        if (this.state.ready && show !== this.state.show) {
          this.setState({ show });
        }
      });
      // 监听该DOM节点曝光
      intersectionObserver.observe(current);
    }

    componentWillUnmount() {
      // 卸载时清除引用
      const current = this.ref.current;
      intersectionObserver.unobserve(current);
      map.delete(current);
    }

    render() {
      return (
        <div ref={this.ref} style={{ height: this.state.height || 'auto' }} >
          {(this.state.show && this.state.ready) ? <Component {...this.props} infiniteReady={this.readyHandle} infiniteReportHeight={this.reportHeight}> : null}
        </div>
      );
    }

    private reportHeight = (height: number) => {
      // 高度由具体的业务ITEM节点上报
      this.setState({ height });
    };

    private readyHandle = () => {
      // ITEM节点是否准备完毕,只有准备完毕的隐藏节点才会被移除
      this.setState({ ready: true, show: this.getVisibility() });
    }

    private getVisibility = () => {
      // 手动计算该节点是否曝光
      const rect = this.ref.current.getBoundingClientRect();
      const wh = window.innerHeight;
      const ww = window.innerWidth;
      return rect.top > -0.5 * wh && rect.bottom < 1.5 * wh && rect.left  < 1.5 * ww && rect.right > -0.5 * ww;
    }
  }
}
解释一下上面的代码
-
首先,声明一个
IntersectionObserver实例来监听节点的隐藏与显示 -
声明一个map对象将dom元素与回调进行关联
-
声明一个高阶函数
createInfiniteScrollItem,用来包裹列表项组件,同时提供曝光显示,隐藏删除的逻辑
主要的逻辑都在高阶组件里面,该组件仅仅只是给列表项组件包裹了一层div,借着这个div节点,监听其隐藏与显示,同时当Component准备完毕时可以上报ready, 此时监听到节点显示隐藏是才会改变show属性。
需要注意的是,当infiniteReady调用时,该组件可能已经处于隐藏状态,而此时需要主动判断一下当前元素的显示隐藏, 如果不调用,就只能等到下次元素可见性变化时才能起效,这是不合理的。
而列表项组件内也需要通过infiniteReportHeight方法上报高度,只有上报高度的组件才能被隐藏,因为这样才不会影响到页面整体的布局。
特别需要注意的是,当组件被卸载时注意将intersectionObserver与map数据清除,否则会内存泄漏。
这样我们就简单的实现了第一个无限加载的组件,当我们运行起来的时候会发现,如果是滑的慢的话,似乎没有什么问题,但是当你快速滑动时,就会发现页面变得很卡,比优化前还要卡。这是为什么呢?
这是因为我们频繁的调用了setState去改变组件的状态,当快速滑动时,一下变化的组件太多,就产生了很多的setState。
要知道setState的时候并不单单只是调用一个函数那么简单,用“冰山一角”来形容这个方法再适合不过了,它设置完之后的REACT更新,DOM更新导致页面的卡顿。
大量的setState产生了大量js调用堆积,导致页面卡顿,导致IntersectionObserver无法被调用(因为IntersectionObserver是在浏览器空闲时才会被调用的),这就是为什么会那么卡的原因了。
所以这个方法表面上看似乎行得通,但是其实是不对的,尤其是大量的setState都是单独的调用,并不会被合并,性能的损耗是极大的(React并没有提供主动合并setState的手段,或者使用redux, mobx这类的全局状态管理库才能实现多次设置一次更新)。
考虑到仅仅是一个长列表的简单组件并不需要使用redux, mobx此类的库(如果项目中本来就用到又另说)。
那么换一个思路,我们可以把列表数据抽离到上一层的组件中,用一个list组件将items都包裹起来,这样就可以随心所欲的更改列表数据而不会没项更新都setState了。
优化后方案
抽离出InfiniteScroll组件。
export default class InfiniteScroll extends Component {
  render() {
    const list2 = this.sortList(this.state.list);
    return (
      <div className="infinite-scroll">
        {list2.map((item, index) => {
          const key = this.props.id ? item[this.props.id] : index;
          return (
            <InfiniteScrollItem
              key={key}
              index={item.is_index}
              is_height={item.is_height}
              reportHeight={reportHeight}
              renderItem={this.renderItem}
              item={item}
            />
          );
        })}
      </div>
    );
  }
}
从上面的代码可以看到有个sortList的方法,这个方法的作用是 “使用js判断哪些组件是显示的,哪些组件是隐藏的”。
为什么要使用js判断呢? 因为js运行速度快, 既然已经知道了每个元素的高度,那就没有必要通过IntersectionObserver或者getBoundingClientRect去动态获取元素是否显示了。
我们只需要知道父盒子当前的top,就可以自己计算出来列表内的哪些元素是可见的。充分利用好js执行比dom交互快的优点。
而sortList这个方法就是通过父盒子的top值,与每个列表项高度去计算哪些元素是可见的。
private sortList = (list) => {
    let top = this.state.boxTop; // 盒子滚动高度,只需要监听scroll并更新list盒子的top值
    const minTop = -this.windowHeight; // 距离视图顶部一屏幕
    const maxTop = this.windowHeight * 2; // 距离视图底部一屏幕
    const _list: any[] = [];
    list.forEach((item, index) => {
      if (item.is_height) { // 上报了height也意味着加载完成了
        top += item.is_height;
        if (!item.is_loaded || top > minTop && top < maxTop) { // 如果该列表项还未确认最终高度,或者在判断范围内
          _list.push(item);
        } else { // 如果不在判断范围内
          const lastItem = _list[_list.length - 1];
          if (lastItem?.type === 'block') { // 判断新列表对后一项是不是一个空div
            lastItem.is_height += item.is_height; // 更新这个空div的高度
            lastItem.maxIndex = index; // 记录一下隐藏的最大项的index
            lastItem.id = lastItem.minIndex + '/' + lastItem.maxIndex; // 使用范围做key
          } else { // 如果列表项最后一项不是空div,则添加一个空div
            _list.push({
              type: 'block',
              is_height: item.is_height,
              maxIndex: index,
              minIndex: index,
              id: index + '/' + index,
            });
          }
        }
      } else {
        _list.push(item); // 因为height有可能是异步的,所以一开始的时候列表项是没有height值的,这时候需要将该项显示出来,只有等到它加载完毕了才动态计算是否加载完成
      }
    });
    return _list;
  }
sortList的实现就是遵循着 “未加载完成的与在显示范围内的元素可以显示,其他隐藏列表项就近合并成一个空白div" 的规则输出一个新的list。
这里使用循环去遍历性能是会比二叉树要差,但是因为列表项高度是异步的,所以只能使用遍历的方式去判断每个节点是否已经上报height(上报height意味着已经加载完成了,就可以渲染了)
这个方法是长列表优化的最核心的方法了,其他方法可以简单实现。这里我简单列一下结构以及它的功能,具体的实现可以看一下react-infinite-auto-scroll。
将长列表优化组件拆分成两个组件,一个是列表容器,一个包裹列表项容器。
其中InfiniteScroll组件如下:
import InfiniteScrollItem from './scrollItem';

const map = new Map();

export function clearHeightCache() { // 因为map缓存放在模块内,所以提供一个主动清除缓存的方法,如果不清除,则下次渲染该列表就可以直接使用缓存了。
  map.clear();
}

const inClient = typeof window !== 'undefined'; // 判断是否在客户端,用来支持服务端渲染

export default class InfiniteScroller extends Component {
  state = {
    list: [],
    boxTop: 0,
  };

  lock = false; // 声明一个变量用来节流

  windowHeight = inClient ? window.innerHeight : 700; // 视口高度

  // ...

  static getDerivedStateFromProps(props, state) { // 注意需要将传入进来的列表转化成组件内的state,因为我们需要往列表内添加变量
    const newList = props.list.map((item, index) => {
      const key = props.id ? item[props.id] : item;
      const mapItem = map.get(key) || {};
      return { ...item, is_height: mapItem.height, is_loaded: mapItem.loaded, is_index: index };
    });
    return { ...state, list: newList };
  }

  componentDidMount() {
    this.updateBoxTop(); // 主动调一次更新列表容器的top
    if (inClient) {
      this.getScrollElement().addEventListener('scroll', this.onScroll, false); // 监听浏览器滚动,更新列表容器的top
    }
  }

  // componentWillUnmount 需要将监听清除

  // render 就是上面提到的render方法

  // sortList 同上

  reportHeight = (index, height, loaded) => { // 注意这里需要同时更新map和state
    const list: any[] = this.state.list;
    list[index].is_height = height;
    const key = this.getMapKey(list[index]);
    map.set(key, { height, loaded });
    this.setState({ list });
  }

  getMapKey = (item) => { // 注意列表项需要指定一个key,用index做key的话遇到列表前插入或删除项会导致map缓存起来的数据错乱
    return this.props.id && item ? item[this.props.id] : item;
  }

  // onScroll 没什么好说的,通过getBoundingClientRect获取列表容器的top并更新,最多加个节流控制一下频率

  // getScrollElement 考虑到可能滚动的不是window,所以允许从外部传入root获取滚动元素

  // updateBoxTop 更新state的top
}
可以看到列表容器组件主要作用就是监听滚动,并实时计算哪些列表项是显示的,以及记录列表项的高度。
InfiniteScrollItem组件如下。
export default class InfiniteScrollItem extends Component {
  ref = React.createRef();

  render() {
    const item = this.props.item;
    if (item.type === 'block') {
      return <div style={{ height: this.props.is_height }} ref={this.ref}></div>;
    }
    return (
      <div className="infinite-scroll-item" style={{ height: this.props.is_height || 'auto' }} ref={this.ref}>
        {this.props.renderItem({ ...this.props.item, emitReportHeight: this.changeHeight }, this.props.index)}
      </div>
    );
  }

  private changeHeight = (height, loaded) => {
      if (height && height !== this.props.is_height) {
        this.props.reportHeight(this.props.index, height, loaded);
      }
  }
}
InfiniteScrollItem组件很简单,只是提供一个上报接口的方法,以及在render的时候判断是渲染一个空白节点还是渲染组件。
将组件渲染完成的回调提供给组件使用者,当它确定了高度不再变化则上报高度,然后才会根据其在列表中所处的位置判断该元素是否可见。
使用方式
这个长列表优化组件提供了一个react组件与一个api。
在列表的页面插入组件InfiniteScroll:
render() {
    return (
      <div className="list" ref={this.refList}>
        <InfiniteScroll
          id={'id'}
          list={this.state.list}
          renderItem={(item, index) => {
            return (
              <Item {...item} />
            );
          }}/>
      </div>
    );
  }
在列表项组件中调用emitReportHeightapi:
class Item extends Component<IProps> {
  ref = React.createRef();

  componentDidMount() {
    if (!this.props.img) { // 高度不依赖异步资源也要主动确认高度
      this.reportHeight(true);
    }
  }

  render() {
    const { text, img, is_index } = this.props;
    return (
      <div className="item" ref={this.ref}>
        <p className="text">{text}</p>
        {img ? <img className="img" src={img} alt="" onLoad={this.imgLoad} onError={this.imgLoad}/> : null}
      </div>
    );
  }

  imgLoad = () => {
    this.reportHeight(true); // 图片加载成功或者失败都要主动确认高度
  };

  reportHeight(loaded) {
    const height = this.ref.current?.getBoundingClientRect().height;
    this.props.emitReportHeight && height && this.props.emitReportHeight(height, loaded);
  }
}


export default Item;
这个组件最重要的点在于“给列表项提供唯一的key”和“在列表项内主动调用api确定高度”。
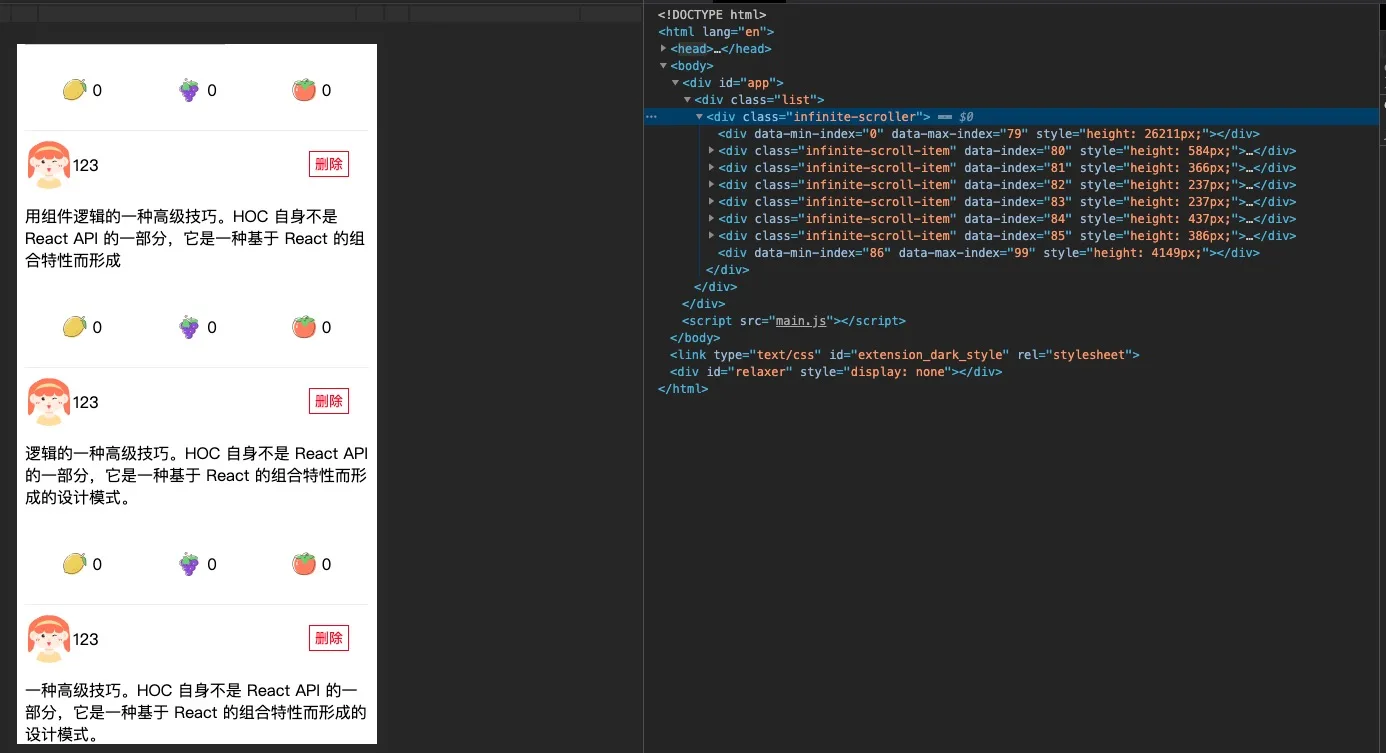
最终呈现出来的效果如下:
总结
总的来说,这个长列表优化方法的原理就是“只显示处于窗口特定范围的元素,其他元素通过合并成空节点的形式进行隐藏,并且通过监听父节点的滚动更新列表项的显示或隐藏”。
注意:
-
这种实现方式实现的列表项会被频繁的插入或者隐藏,所以不应该在挂载或卸载的时候做一些特殊逻辑。
-
需要关注异步加载失败的情况,重新加载或者直接上报高度。
完整代码请看 👉 react-infinite-auto-scroller